
I have a friend on a New Orleans food forum that is an exceptional man. He is a gourmet cook, a carpenter, a baker and now I learn that he makes his own version of "yogurt cheeze." This blog post will be copied verbatim from his words to this blog! Thank you "Jim Z" for taking the pictures and allowing me to give a step by step tutorial on making "yogurt cheeze."
"I have been making this for about three years now, since I read about Greek yogurt and wondered what it was. Strained yogurt. Bought some and did not find much difference between that and regular yogurt. So I thought I would strain my own and took it one step further.
First, line a medium size strainer with a clean light weight cloth.

Next add the carton of yogurt to the strainer over a small bowl.

NOTE: It's very important to fold up the four corners over the yogurt or you will have one mess in the refrigerator. Learned that the hard way. Refrigerate on the top shelf.

The next day you will have collected this much whey, about 1 3/4 cups. Do not throw this away. Put in 1 cup zip lock bags and freeze. This is good for breads, soups, etc.


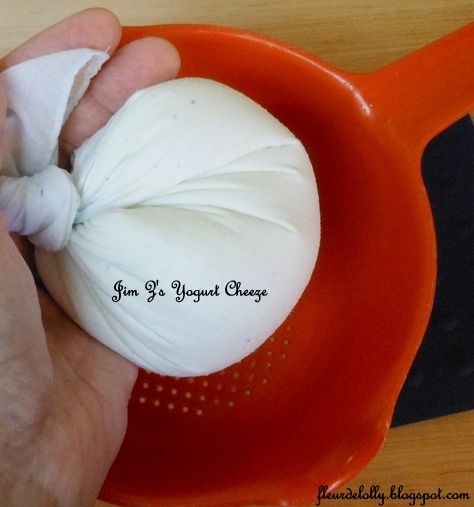
Grab all four corners of the cloth and give a firm downward shake to settle the yogurt in the bottom of the cloth.

With your other hand, start twisting the cloth to squeeze out more whey. I take both hands and cup the ball of yogurt and squeeze out more liquid. Then put it back into the refrigerator on the top shelf till the next day to repeat the process.
The next day the yogurt cheeze will look like this. Repeat the squeezing out of the liquid and return to the top shelf of the refrigerator.

All done on Day 4!


There is a big flavor change from start to end. Use the yogurt cheeze in anything that you would use cream cheese for in appetizer dishes."

In this photo, Jim Z has toasted some Triscuits in the oven, topped with a dollop of Yogurt Cheeze, topped with a bit of asparagus, cherry tomatoes and some dried basil.

Thank you Jim Z!


No comments:
Post a Comment