Wednesday, June 4, 2025

Around Lolly's Sideboard: Hull Pottery - Tokay Pattern


This sideboard will require a bit of background storytelling.  Get yourself a cup of coffee or tea.  

My paternal grandmother, Clara, owned and operated a country store during the 40's and 50's.  She had closed it before I was born.  In her store, she had items for sale that her neighbors in the rural area might need.  There was milk and dairy products, some fruit and vegetables, bread, bologna (cut to however much was requested), etc., along with Jewel Tea products and Hull pottery products.  

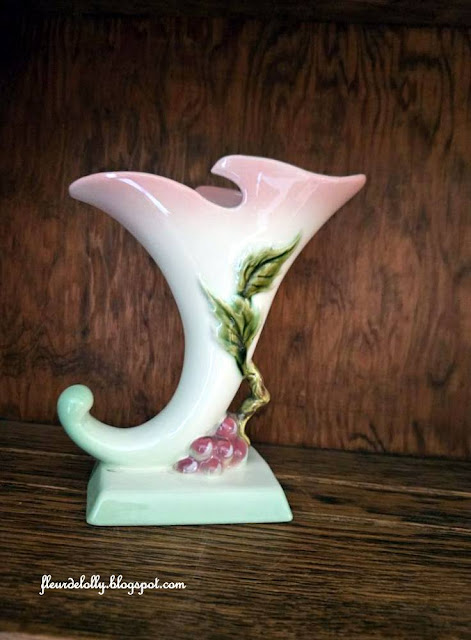
For as long as I can remember, my mother had seven of the pieces of Hull pictured above on display somewhere in our living room while I was growing up.  I always thought they were just so beautiful.  My grandmother had given my mother the three pieces of the top shelf, the three pieces on the bottom, and the middle piece on the middle shelf.

As my mother aged, she would occasionally tell me if I wanted to take a piece of her collection home, I could.  I was reluctant because a) I didn't want to be greedy; b) how could I choose; c) it's a difficult thing to start taking treasured pieces out of your mama's house.  

She sensed my reluctance and I began receiving a piece for my birthday or Christmas, or just because she wanted me to have it on that particular day.  

Here's a little background on this particular pattern:  Tokay.  This pattern was produced in 1958 along with it's coordinating pattern Tuscany during 1958-1960.  

Tokay has an embossed leaf and grape decor in allover high-gloss background of milk white with forest green grapes and leaves or high gloss duotoned spray tinted light green and Sweet Pink with pink grapes and green leaves.  Eighteen shapes were catalogued.  

Tuscany has an embossed leaf and grape decor in allover high gloss backgrounds of milk white or Sweet Pink with with green grapes and leaves.  Eighteen shapes were initially catalogued.

These two vases on the top shelf measure 12" tall.  I've always thought they looked so elegant.


The basket on the top shelf measures 11" tall.


Look on the second shelf from the top and the middle piece. This is called a consolette candle holder and it measures 15 3/4 inches long.  These pieces were primarily used as the main centerpiece for a dining table or console table, holding floral arrangements, decorative items, or simply displayed on their own.  There are two glass candles which fit into candleholders in each end of the consolette.


This vase is 10 inches high.  I can remember my mom using this occasionally when my maternal grandmother brought her flowers from her garden.


The ewer measures 8 inches tall and is one of the more delicate pieces of this grouping.


This unique piece is called a Moon Basket and is 10 1/2 inches tall.


This piece was my mother in law's.  The vase measures just over 9 inches tall.


I found this piece "in the wild" at an antique mall.  It's listed as a covered candy dish and is 8 1/2 inches high.


I purchased this book online and it has been extremely helpful in my quest for learning as much as I can about Hull pottery.  If you have even a passing interest in beginning a collection of any of the many patterns of this gorgeous pottery, I fully endorse this book.


My mother used THIS book as her resource.  Check out her writing on the inside cover.


I hope you enjoyed learning a little about Hull pottery and my family's connection.


Tuesday, June 3, 2025

2025 Alabama BBQ Tour: Tuscaloosa County - Archibald's BBQ, Tuscaloosa, Alabama


Tuscaloosa County's history spans from Native American settlement to its role as the Alabama state capital. The area was inhabited by Native American tribes, including the Choctaw and Creeks, who had a village known as "Black Warrior Village."  Tuscaloosa County was officially established in 1818, and the town of Tuscaloosa was incorporated in 1819. Tuscaloosa served as the state capital from 1826 to 1846, and the University of Alabama was established there in 1831.  The county experienced economic growth in the late 19th and early 20th centuries, fueled by industries like coal mining and the expansion of the University of Alabama.  All that being said, I'll add a "Roll Tide" to the introduction.

We've had several recommendations to check out Archibald's in Northport.  We headed out for the 2 hour drive with a positive vibe that we were going to enjoy some delicious BBQ.  Mind over matter, right?

Our positive attitudes paid off in a delicious way.  Archibald's is definitely classified as a "BBQ Joint" in my opinion.  It's been in business since 1962.


After parking and exiting the car, I went down my mental checklist:

1) do I smell  and see smoke?  Yes.


2)  Is hickory wood present?  Yes.


Even better, I could actually see the hickory wood burning!


And upon entering to order, I could see the OTHER side with the meat being tended to very carefully!


Look carefully under that metal grate.  See outside?  That's where I stood to take a picture of the fire.  

Now look carefully at the close up picture of the meat smoking.  See that cast iron pot?  It's full of sauce that's used to "mop" the meat while it cooks to keep it moist and to add flavor.


This is true Southern BBQ.  

Check out the menu board.


While ordering, we met some of the nicest people yet on the FDL2025BBQtour.  These guys were so friendly, treated us like we had known them for years, and suggested things for us to try.  

Now to the food!

Sweet Harold ordered the smoked chicken with baked beans and cole slaw.


As you can see from the photo, this is a large half chicken!  The color is gorgeous, the meat was tender, and there was ample sauce in the container to enjoy with the chicken.


In his opinion, this chicken is in the Top 3 of the ones he's tried so far.  High praise.

The beans were also some of his favorites.  They were well seasoned with a cumin/chili powder flavor and were nice and smoky.  There were many layers of flavor in that cup of beans!


The slaw was on the sweeter side which isn't his favorite, but he ate every bite, so there you go!


Both of our plates were served with several slices of white bread.  Not Texas Toast, not toasted or seasoned with garlic and/or butter; just sliced white bread.  Again, old school Southern BBQ.  That's perfectly fine with me.


I ordered the small plate of pulled pork and ribs with okra and fries as my side dishes.  I wonder how much food is included on the large plate??


The ribs were really large and meaty.  Tender, but not mushy.  There was a great smoke flavor and the sauce was served on the side.  


Wait for it......


There's that perfect bite!!

The pulled pork was served without sauce as well.  It was chopped, more than pulled, but had a nice flavor.  It was a tad chewy, but I'll forgive that due to the wonderful smoke flavor.


The fries and okra were both your regular garden variety, but both were freshy cooked and served piping hot.


My description of the sauce is somewhat difficult to describe.  Here goes.  It was a thin sauce, vinegar based, but had a lingering heat that wasn't spicy, but more of a gentle warmth from the addition of hot sauce.  No thick, super sweet, smoky sauce here, just a good mop sauce that carried over from the smoking process to the serving plate.  


I noticed on the menu that catfish was served.  You could order a plate or sandwich and, if you wanted, a single piece could be added to your order.

I knew I wanted to try theirs, so I ordered that single piece.  When the "single piece" was delivered, the nice young man said, "I just went ahead and fixed you a sandwich....you'll love this."  He was correct.


The catfish was (I believe) coated with yellow mustard before battering.  The coating was a light, well seasoned, cornmeal.  The catfish was perfectly fried, not the slightest bit greasy.  


I told them as we were leaving that I'd drive back to Tuscaloosa just for this catfish.  This was divine.

The dining area is an adjacent built on room.  You order at the counter in one place, go the dining area, and your food is brought to you.


Standouts:  sweet tea, chicken, beans, ribs, catfish, wonderful staff

Point Takeaways:  counter service, styrofoam/plastic

Our Score:  94

Saturday, May 31, 2025

Grilled Rib Eye Steak with Roasted Bell Peppers


I'm always on the lookout for a new recipe to try and even change a few things to make it more my own.  This one is courtesy of Chef Curtis Stone as found in People magazine!

I knew when I saw the picture that I NEEDED this in my tummy.  Sweet Harold spent the majority of the day pressure washing the deck, so I was more than happy to feed him this yummy and filling meal in reward of all his hard work today.

The original recipe called for 2 yellow/2 red bell peppers.  I changed it to use the "traffic light" bell peppers:  1 EACH of red/yellow/green bell peppers.


Let's get them ready to go first.  Preheat grill to high (450 - 500 degrees F.).  Coat bell peppers with 1 T. of olive oil.  Place peppers on the oiled grates and grill, uncovered, turning occasionally, until charred all over, 12-15 minutes.


Remove from grill to a heatproof bowl and cover with plastic wrap.  Set aside and let steam for 10 minutes.  Uncover bell peppers, remove and discard stems, seeds and charred skins.  Slice into 1 inch strips.

Now we'll make the marinade for them.  You'll need:

1/3 cup olive oil
1/4 cup chopped fresh oregano
2 T. chopped fresh flat-leaf parsley
2 t. grated lemon zest, plus 2 T. fresh juice from 1 lemon
1 garlic clove, finely chopped
3/4 t. salt
1/4 t. black pepper

Whisk all these ingredient together in a medium bowl.  Add the sliced peppers and toss to coat.  Set aside and let marinate while you prepare the steaks.

2 (10 oz.) rib eye steaks (about 1 inch thick)
1 1/2 t. salt
1/2 t. black pepper

Place a wire rack inside a large rimmed baking sheet; set aside.  Pat steaks dry with paper towels.  Sprinkle both sides with salt and pepper. Heat grill to 450 degrees F. Place steaks on oiled grates and grill, uncovered, until a thermometer inserted into thickest portion registers between 130 and 135 degrees F. for medium rare.  For me, that was 4 minutes per side.  


Transfer to baking sheet; let rest for 5 minutes.  

**I took a few minutes and made a compound butter just because.  Take a couple tablespoons of softened butter and add 1/4 t. kosher salt, a grind or two of black pepper, and 1/4 t. granulated garlic. 

While the steaks are resting, top with some of the compound butter to just add an extra layer of yummy flavor.


Slice steak against the grain and place on one half of a large platter.  Arrange bell pepper slices on the other half of the platter.  Spoon remaining oregano sauce over steak and pepper.  Serve immediately.


Wednesday, May 28, 2025

Five Hour Spaghetti Sauce


 On a recent rainy Saturday afternoon, I took to the kitchen for inspiration for dinner.  Y'all know how I love to spend hours making a good sauce for pasta.  I think every time I make sauce there are subtle differences to either my ingredient list or method.  This time was no different.

My secret ingredient for this version was an ingredient from my freezer!  Freezer?  Yes!  During last summer's basil harvest, I made basil, olive oil, and garlic freezer cubes for such a dish as this.  Here's the blog post!

The next time you have some time to cook and want to make your entire home smell ultra inviting, make this sauce!

1 lb. ground chuck
1 medium yellow onion, chopped
1 small green bell pepper, seeded and diced
1 T. Italian seasoning
2 cans (14.5 oz.) tomato sauce
1 can (6 oz.) tomato paste
8 oz. beef broth or stock
1 bay leaf
salt and pepper to taste
dried red pepper flakes (optional)
5 - 6 basil cubes

In a 3 quart Dutch oven, over medium heat, brown ground chuck.  Drain.

Add in onions, bell peppers, and Italian seasoning.  Continue to cook, stirring frequently, for another 5 - 7 minutes until veggies begin to soften.

Stir in tomato sauce, tomato paste, and beef stock and bring to a gentle boil.  Add in the bay leaf and lower heat to a simmer.

Cover and let sauce simmer away for as many hours as you can spare.  Keep the heat very low and stir occasionally to make sure the sauce doesn't stick.

About a half hour before serving, remove the bay leaf and taste.  Add salt and pepper to taste and red pepper flakes if you're using those.

Stir in the basil cubes and let that delicious basil and garlic goodness permeate through the sauce.  

This is the perfect sauce to serve over spaghetti noodles, ziti, with a meatball sub....you get the idea.

Grilled Ribs - 2 Ways


For our Memorial Day meal, I elected to grill two packages of baby back ribs instead of smoking them over hickory chips.

But what sort of dry rub to use?  I decided that two completely different flavor profiles would be fun and we could compare and contrast.  

At a recent BBQ competition, judges were given a gift bag which included a container of Bad Byron's Butt Rub.  Okay, so one flavor was a given!

Then my eye fell on my beloved Hardin's Seasoning in the cabinet.  Of course that would be the choice for the second rack of ribs!


Always remember to remove the membrane on the back side of the ribs.  You can grasp a corner with a paper towel and gently pull and should be able to remove it completely.  Discard.

Choose YOUR favorite dry rub or seasoning and place the rack of ribs on a tray.  Pat the ribs, front and back, with a paper towel to dry them as much as possible.  This will help the dry rub adhere properly.

Thoroughly coat the ribs on both sides and let them rest for 15-20 minutes.

Preheat the gas grill and clean grates.  You'll want to cook the ribs to as close to 325 degrees F. as possible.  The secret to grilling ribs is to cook over indirect heat.  I have a three burner grill.  When the temperature reached 325 degrees, I turned off the middle burner and lowered the heat of the two outside burners to the lowest heat setting.   Then I placed the ribs onto the middle of the grill.


Now the fun wait begins!  Close the lid and keep an eye on the temperature.  Low and slow is the thing for tender ribs.  After about an hour of cooking, I gently brushed the ribs with apple juice using a silicone brush.  That helps to keep them moist and juicy.

After about 3 hours, the internal temperature of the ribs stood steady at 187.  The sweet spot for grilled ribs is 198-203 degrees F.  

I increased the heat slightly and began applying the sauce to both sides of the ribs.


After about another half hour of cooking, the temperature was 202 degrees F.!  We are ready to eat!


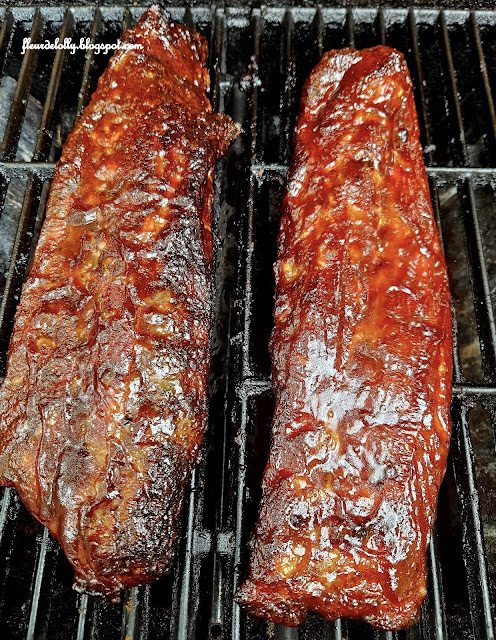
 Those are some pretty ribs!


Our favorite seasoning?  Hardin's hands down!  These were great ribs even if I do say so and here's the proof that the "one bite out of the middle without the meat falling off the bone" was achieved!