Friday, August 19, 2016

Warm Salmon and Asparagus Salad


Family responsibilities have taken front and center of my life this week. Sweet Harold surely didn't want the fresh salmon we purchased to go to waste, so he is our Guest Blogger for this recipe! I appreciate him taking the initiative to cook dinner for me with this wonderful low-carb meal.

Roasting the asparagus gives a deep, complex flavor that leaves boring steamed asparagus far behind. If you want to wow your guests, this is a definite recipe you'll want to print out and save for future reference. On the other hand, this is a delicious weeknight meal for your family as well.

2 pounds asparagus, ends trimmed
2 T. plus 2 t. extra virgin olive oil, divided, plus extra for the baking dish
4 - 6 oz. salmon fillets
2 T. coarse grain mustard Dijon mustard
1 T. white wine vinegar
5 oz. mesclun greens (6 cups)
salt and freshly ground black pepper

Heat oven to 450 degrees.

Place asparagus in a single layer in a baking pan; drizzle with 2 t. of the oil, season with salt and pepper, and turn to coat. Bake until lightly browned, about 20 minutes.

While asparagus is roasting, season salmon with salt and pepper. Lightly brush a baking dish with oil, add salmon, and bake until fish flakes easily with a fork, 10 - 12 minutes.

Place mustard, vinegar, remaining oil, 1/4 t. salt, and 1/8 t. pepper in a glass jar with a lid. Close tightly and shake vigorously to combine; adjust seasoning if necessary.

Combine greens and 2 T. of the dressing in a mixing bowl; toss to coat. Drizzle remaining dressing over the fish and serve with asparagus and greens.


From The South Beach Diet Quick and Easy Cookbook

Monday, August 15, 2016

Low Carb Breakfast Muffins


Are you looking for a breakfast that you can prepare ahead of time and grab as you (or your kids) race out the door in the morning? These little muffins are packed full of protein to help you get through the morning without the carbs which may cause the blood sugar spikes that can leave you exhausted before lunch.

You can mix and match proteins. For this batch, I used turkey sausage crumbles. Vegetables? Your choice there as well, I used diced red bell peppers. Low-fat shredded cheddar adds a creamy texture. The eggs are all whisked together, but each muffin will contain (more or less) one egg.

1 cup pre-cooked turkey sausage crumbles
1/2 cup diced red bell peppers
12 eggs
salt and pepper to taste
1/2 cup shredded low-fat cheddar cheese

Preheat oven to 350 degrees.

Spray a 12 cup muffin tin with non-stick spray.

Divide the turkey sausage crumbles among the 12 muffin tins. Repeat with the red bell peppers. 

Whisk the eggs in a large measuring cup. I used a 4 cup measuring cup. Add 1/4 t. each salt and black pepper. Whisk again to combine.

Slowly pour the egg mixture into the muffin tins over the sausage and peppers.

Sprinkle with the cheddar cheese.

Bake for 15 - 18 minutes until eggs are cooked through. Cool on a wire rack.

Refrigerate when cooled.  Now you're set for the next few mornings. They can be rewarmed in a toaster oven or microwave and eaten on the go if needed!


Sunday, August 14, 2016

Garlic and Herb Pork Tenderloin cooked with Tomatoes and Green Beans


We're going to be enjoying some low(er) carb meals for a few weeks. This delicious meal has the added distinction of being a slow cooker meal. If that isn't enough to convince you to try this one, the prep time for this meal?  7 minutes.  Yes, you're reading that correctly. 7 minutes to place the ingredients in the slow cooker and I went about my business.  4 hours on high heat and our meal was ready to eat. And yes, it was, oh, so good.

1 - 1 lb. pork tenderloin (this one was garlic and herb flavor)
1 medium yellow onion, quartered
1 can green beans, drained
1 can diced tomatoes with basil and oregano, with liquid
2 garlic cloves, minced
salt and pepper to taste

Preheat slow cooker on high. Place tenderloin into slow cooker. Add onions, green beans, tomatoes, and garlic. Lightly salt and pepper.

Cover and cook on high for 4 hours or on low heat for 6 hours.


Tuesday, August 9, 2016

Brazilian Steak with Spicy Tomato Coconut Sauce


You must admit this is an impressive platter of food to bring to any table. There is literally something for everyone on this dish. Grilled flank steak with a spicy tomato coconut sauce would be enough, but then......add grilled sweet potatoes, grilled corn, black beans, quinoa cooked in coconut milk......yes THAT would be enough....but then add the fried plantains!

I adapted this delicious meal from a recipe found on www.halfbakedharvest.com.  There appears to be a lot of ingredients and many steps. On the plus side, this is a fun "bring everybody into the kitchen" dish to share the fun. Delegate the steps of cooking and everything will be ready to eat at the same time. Please read through the entire recipe before you start. You'll be able to judge when to cook what and in what order is best for you.

Let's work on the steak prep first:

Steak and No Cook Tomato Sauce
1 1/2 lbs. flank or skirt steak
1/2 cup olive oil
1/3 cup lime juice
2 cloves garlic, minced or grated
2 fresno chilies or jalapeno peppers, seeded and diced
1 1/2 T. hot or smoked paprika
2 t. fresh ginger, grated
1 t. ground cumin
1/2 t. salt and pepper, plus more if needed
1/2 cup fresh cilantro, chopped (if you have cilantro haters, substitute parsley)
1 ripe heirloom tomato, finely chopped
1/2 cup canned coconut milk

Place the steak into a large bowl with a lid or Ziploc bag.

In a bowl, combine the olive oil, lime juice, garlic, chili peppers, paprika, ginger, cumin, salt, pepper, and cilantro. Pour about half the sauce over the steak. The remainder will be used to make the sauce. Rub the marinade all over the steak. Coat it completely. Seal the bag or cover the bowl and refrigerate at least 2 hours or overnight.

Take the finely chopped tomato (it should be chopped fine enough to seem like a sauce. Add to the bowl with the remaining marinade (sauce) referenced above. Add the coconut milk and mix until combined. Season lightly with salt and pepper. Cover and store in the refrigerator. Bring to room temperature before serving.

Preheat the grill to high. When preheated, add the steak to the hot grill and grill for 3 - 4 minutes on each side or until nice char marks are visible. Use an instant read thermometer for your perfect degree of doneness.

When you're ready to grill the steak, you'll need to prepare the remainder of the side dish portions of the dish. 

For the sweet potatoes:
2 medium sweet potatoes, cut into wedges
2 T. olive oil
salt and pepper

Bring a large pot of salted water to a boil. Add the sweet potato wedges and boil for about 5 minutes or until just fork tender. Remove from water and drain. Toss the sweet potato wedges in the olive oil and salt and pepper.

When you're grilling the steak, add the sweet potato wedges on the hot grill and grill for 3 - 4 minutes on each side or until nice char marks are visible. If you have a small grill, grill the steak first, and while it rests, you can grill the potatoes.


For the quinoa:
1 cup uncooked quinoa
2 cups coconut milk

Add the coconut milk to a medium saucepan and bring to a low boil. Watch carefully so that it doesn't boil over. Add the quinoa, cover and reduce the heat to low. Simmer over low heat for about 20 minutes. Fluff with a fork and keep warm.

For the plaintains:
2 yellow plaintains, sliced into 1/2 inch rounds
oil for frying

Heat an inch or so of oil in a medium skillet over medium heat. When the oil begins to shimmer, add the plaintains and fry for 2 - 3 minutes per side until just lightly golden and crispy. Remove to a paper towel lined plate and lightly salt.

For the remaining side dishes:
I simply heated a can of rinsed and drained black beans. For the corn, you could easily open a can of Mexicorn, or grill a few ears of corn on the grill while the steak and potatoes are cooking. Slice the corn off the cob before serving.

Now assemble all your gorgeous dishes on a large platter. Take time to plate carefully to fully maximize the beautiful colors and textures. Just before serving, spoon the spicy tomato coconut sauce over the sliced steak. Add a few more slices of heirloom tomato or cherry tomatoes for another splash of color.



Summer Olympics 2016 - Beverage Selection

World Market provided assistance with my beverages choices for the Brazilian theme Olympic meal. I'm not much of a beer drinker, and definitely don't choose the darker versions when I do.

Palma Louca was the brand I chose to go along with the beef and bean empanadas for the appetizer portion of the meal.

It was very light with a crisp taste, but very little carbonation. It was okay for what I needed (a Brazilian beer on the table!), but I wouldn't purchase again.


Now on to the wine portion of the meal!


No Brazilian wines to be found, so we went to the motherland of Portugal. These two choices were spot on. I would purchase both of them again. And again. 

I served the Vila Nova Vinho Verde with the hearts of palm salad. Perfection. This wine was a mixture of a dry white and a light fizz! Very light and refreshing with citrus flavors.

Next up I knew I needed a wine that would stand up again the bold flavors of the grilled flank steak. Vila Nova Douro Red has a dark, deep, ruby red color and rich flavor. Not only did it compliment the grilled beef, it was a true pairing for the chocolate truffles for dessert.
Beef and Bean Empanadas


I've always wanted to try to make empanadas. But with everything else to cook for the Brazilian Olympic themed meal, I took a few short cuts, one being using prepared pie crusts. 

First of all, this makes a large amount of filling. You have several ways of going with this. You can make the filling as I had written, and either have enough hand pies for a party (!) or you can use larger diameter biscuit cutters to have larger empanadas, OR you can make as many empanadas as you'd like, and use the remaining filling later in the week for burritos or tacos.  See? Lots of options here.

I have this nice set of pastry cutters bought at the Kitchen Collection which gives different sizes to choose from. For my empanadas, I used the 4 inch cutter.


1 lb. lean ground chuck
1 T. paprika
1 t. ground cumin
1 t. chili powder
1/8 t.  cayenne pepper
1/2 red bell pepper, seeded and diced
1/2 large yellow onion, diced
2 - 3 jalapenos, seeded and diced
2 cloves garlic
1 can Rotel tomatoes
1 can black beans, rinsed and drained
8 oz. block of pepper jack cheese, shredded
1/4 cup chopped cilantro
2 rolls prepared pie crusts
1 egg, lightly beaten (for the egg wash)

Place first nine ingredients in large skillet over medium high heat and cook until meat is cooked and vegetables have softened, about 5 - 6 minutes.

Add Rotel tomatoes and black beans and lower heat to low. Let simmer for 3 - 4 minutes. 

Slowly add shredded cheese a few spoonfuls at a time, stirring to blend in to the meat and vegetable mixture. Add cilantro and stir.

Remove from heat and allow to cool for a 5 - 10 minutes.

Preheat oven to 400 degrees.

Prepare the dough:
Roll the dough out on a floured surface until it is 1/4 inch thickness.Cut out roughly 4 inch round circles in the dough using biscuit cutters or a sauce turned upside down.

Place 1 - 2 T. of filing in the center and fold the circle in a half moon. Use a fork to crimp the edges together and seal the empanada closed. Place on a baking sheet. Continue this process with remaining dough/filling.

Once you've formed all the empanadas, brush them with the egg wash. Bake for approximately 20 - 22 minutes or until golden brown. 

Serve with salsa, sour cream, sliced avocado, etc.


Monday, August 8, 2016

Summer Olympics 2016 Table Setting


As I've written before, when I plan a theme meal, the first step for me is the table setting. I normally have the table setting completely finished before I cook one bite of food, sometimes before I even begin grocery shopping!

With this year's Olympics being held in Brazil, I had several options: 1) give a shout out to the USA and go strictly red, white, and blue; 2) use the colors of the Olympic Rings; or 3) incorporate the colors of the Brazilian flag, green, yellow, and blue.  Fiestaware, as always, provided those colors.

So with gold chargers, gold napkin rings, and gold S and P shakers, everything else fell into place.


 A simple flower arrangement was the perfect centerpiece.


And here is the Olympic menu filled to the brim with Brazilian goodies!


Brazilian Hearts of Palm Salad


Another food item I've never tried: hearts of palm. Very simply, hearts of palm are the inner core and growing bud of the palm tree. The stem of the palm tree is harvested and the bark is removed. This leaves a layer of white fiber around the central core. Then the fiber is removed which leaves the heart of the palm which can be eaten. Fresh hearts of palm tend to be crisp and crunchy and the canned hearts of palm are much softer. 

They are a delicious and healthy addition to your salads. The taste, to me, was a cross between asparagus and an artichoke. It really picked up the citrus from the lime and was a very refreshing salad course.

Nutritionally, hearts of palm contains Vitamins C, B-3, B-6, A, and E. As far as minerals go, it contains, zinc, potassium, and calcium. Definitely worth adding some to your next salad!

2 (14 oz.) cans of sliced hearts of palm, drained
1 medium tomato, finely chopped
1/2 small white or yellow onion, very thinly sliced
2 green onions, finely chopped
3 T. olive oil
2 t. fresh lime juice
1/4 t. salt
a pinch of black pepper

In a medium bowl, combine hearts of palm, tomato, onion slices, and green onions.

In a small bowl, combine the olive oil, lime juice, salt and pepper. Pour it over the vegetables, stir gently to coat and serve.


From www.cookthestory.com

Brigadeiros


I had never heard of these little dessert bites until I began researching desserts for the Brazilian themed Olympic party. When I saw that condensed milk was the main ingredient, I knew this is one I needed to try.

Also known as Brazilian truffles, Brigadeiros can be made stove top or in the microwave. A combination of condensed milk, butter, chocolate, and a touch of salt is so simple, but oh so delicious. You can roll the chilled balls of chocolate in sprinkles, chocolate sprinkles, nuts, or coconut. Or you can do as I did, and have a variety.

1 can (14 oz.) sweetened condensed milk
2 oz. unsweetened chocolate
2 T. unsalted butter
1/8 t. salt

Pour the condensed milk in a large microwavable bowl. Add chocolate and butter.

Microwave on high for about 45 seconds. Take the bowl from the microwave and stir to combine the ingredients.

The next step is based on your microwave's wattage. Microwave for another five minutes, TAKING THE BOWL OUT AND STIRRING AFTER EACH ONE MINUTE INCREMENT.

The mixture is done when when it has been become thick and fudgey and it pulls away from the side of the bowl as you stir the mixture. For my batch, it took 4 minutes.

Stir in the salt.

Spoon the mixture onto a large plate and chill for at least 3 hours or overnight.

Shape the brigadeiros. With a spoon, scoop out about 2 t. of the mixture. Rub a little butter onto the palms of your hands to prevent the chocolate from sticking. Roll the brigadeiros into a little ball, and roll the ball in the topping of your choice.


Brigadeiros will keep at room temperature for about 2 days, and in the refrigerator for up to a week.

From passthecocoa.com


Pan de Queso (Brazilian Cheese Buns)


The only two things I needed to convince me to make this recipe were the two words "Cheese" and "Bread." Two of my most favorite things on earth. As I began researching these little delicacies, I knew I had never heard of tapioca starch. Tapioca, yes. Tapioca starch, no. I found a bag at Whole Foods and knew I was good to go.

The result of tapioca starch combined with freshly grated Parmesan cheese and an egg produced an aromatic, chewy, cheesy bread. Yes, they are addictive!

1/2 cup water
1/2 cup milk
1/4 cup oil
1/2 salt
1 1/2 cup tapioca starch (or tapioca flour)
1 egg
1 cup freshly grated Parmesan cheese

Preheat oven to 350 degrees. Grease a baking sheet.

Bring water, milk, oil, and salt to a boil in a large saucepan. Remove from heat and add tapioca starch and mix well.

Let cool, 10 - 15 minutes.

Transfer tapioca mixture to a large bowl. Add egg and stir to combine. Fold in Parmesan cheese and knead until dough is smooth but still sticky.

Scoop out 1 T. of the dough and roll into small ball. Place on baking sheet. Repeat with remaining dough.

Bake in the preheated oven until golden brown, about 20 minutes.


From www.allrecipes.com 

Thursday, August 4, 2016

Cod (or Halibut) Piccata


The original recipe called for Halibut, but Cod is a nice alternative. Cod was present at my local supermarket and halibut was not, so you get the cod version!

This is a perfect meal for two. Very seldom do I mix cheese with fish, but the small amount of grated (not shredded!) Parmesan adheres to the fish with the panko crumbs giving it a lovely crunchy crust.

You can bread the fish up to an hour before sauteing, just make sure the fish is kept in the refrigerator.

1/2 cup panko bread crumbs
1 T. EACH cornstarch and grated Parmesan
1 egg, beaten
2 halibut fillets, or other firm white fish (6 oz. each)
salt and black pepper
1 T. olive oil

2 t. EACH minced fresh garlic and shallots
1/2 cup dry white wine
2 T. fresh lemon juice
1 T. capers
1 t. tomato paste
2 T. unsalted butter
1 T. minced fresh parsley

For the fish, combine panko, cornstarch, and Parmesan in a shallow dish.  Place egg in another shallow dish. Season fillets with salt and pepper.

Dip fillets in egg, letting excess drip back into the dish. Dredge fillets in panko mixture, coating all sides.

Heat oil in a non-stick skillet over medium high. Add fillets and saute until golden brown, 4 - 5 minutes per side. Remove fish from pan and keep warm.

For the sauce, add garlic and shallots to the skillet; saute until fragrant, about 2 minutes.

Deglaze skillet with wine and simmer until reduced by half, 3 - 4 minutes. Stir in lemon juice, capers, and tomato paste and simmer until slightly thickened; whisk in butter until melted. Season sauce with salt and pepper and stir in parsley.


From Cuisine at Home Issue #117

Wednesday, August 3, 2016

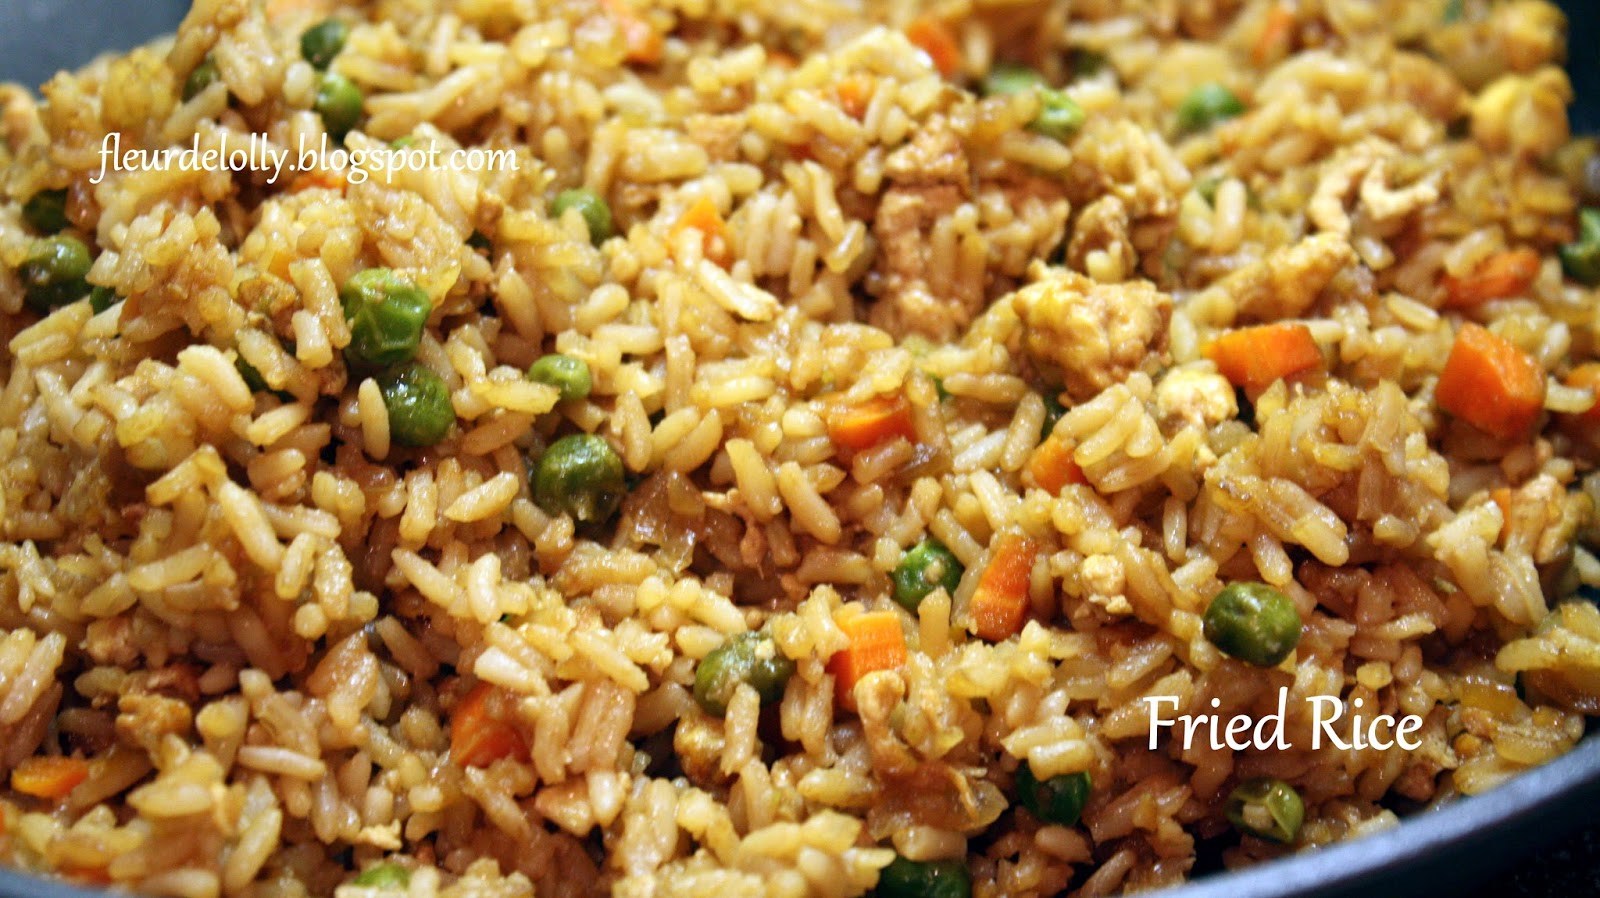
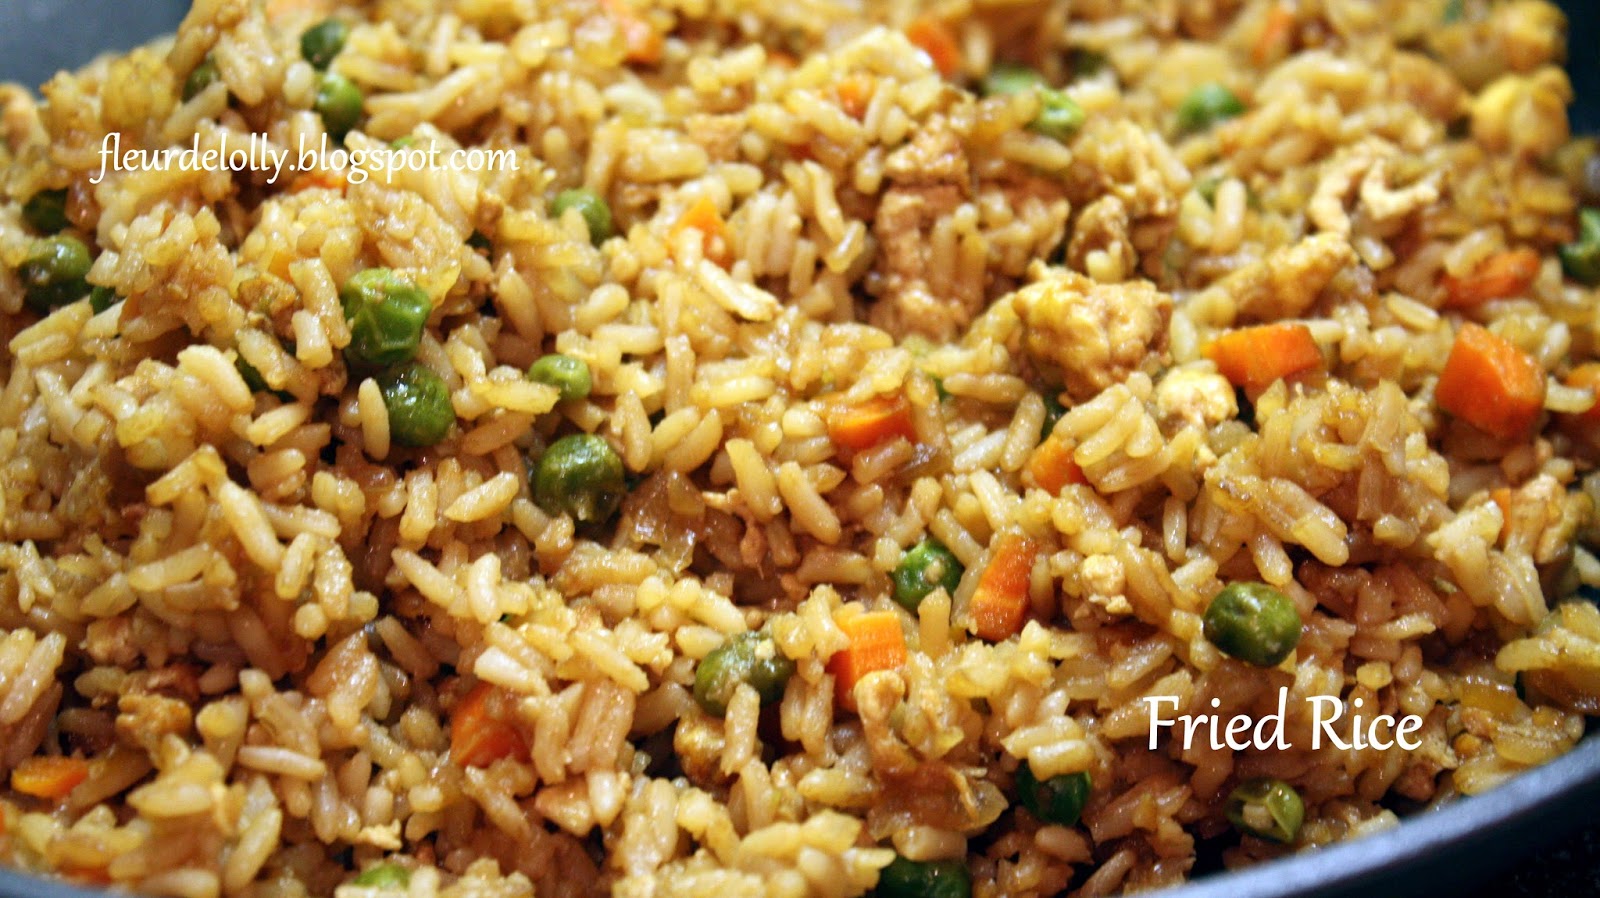
Fried Rice


This is an extremely easy fried rice recipe made even easier by boil in bag rice and staples you more than likely have in your fridge. Prepare as is for a vegetarian version or add tofu. Simply add 1 - 2 cups of your favorite protein (cooked chicken, shrimp, or beef) for a full, satisfying meal.

4 cups cooked rice (either cook your own or 2 boil in bags, cooked and drained)
3 T. olive oil
1 medium onion, diced
1 medium carrot, diced
1/2 cup frozen green peas
2 - 3 cloves garlic, minced
1/2 cup low sodium soy sauce
3 eggs, lightly beaten

Heat olive oil in a large skillet over medium heat. Add onions, carrots, peas, and garlic. Saute, stirring occasionally, until vegetables soften, about 5 - 6 minutes.


Push vegetables to one side of skillet and add eggs.


Carefully scramble eggs until set.


Mix eggs and vegetables together.


Add soy sauce and stir to mix.


Add rice a few spoonfuls at a time and continuing stirring until everything is well combined. Turn heat to high. Stir constantly to allow everything to heat through and serve immediately.


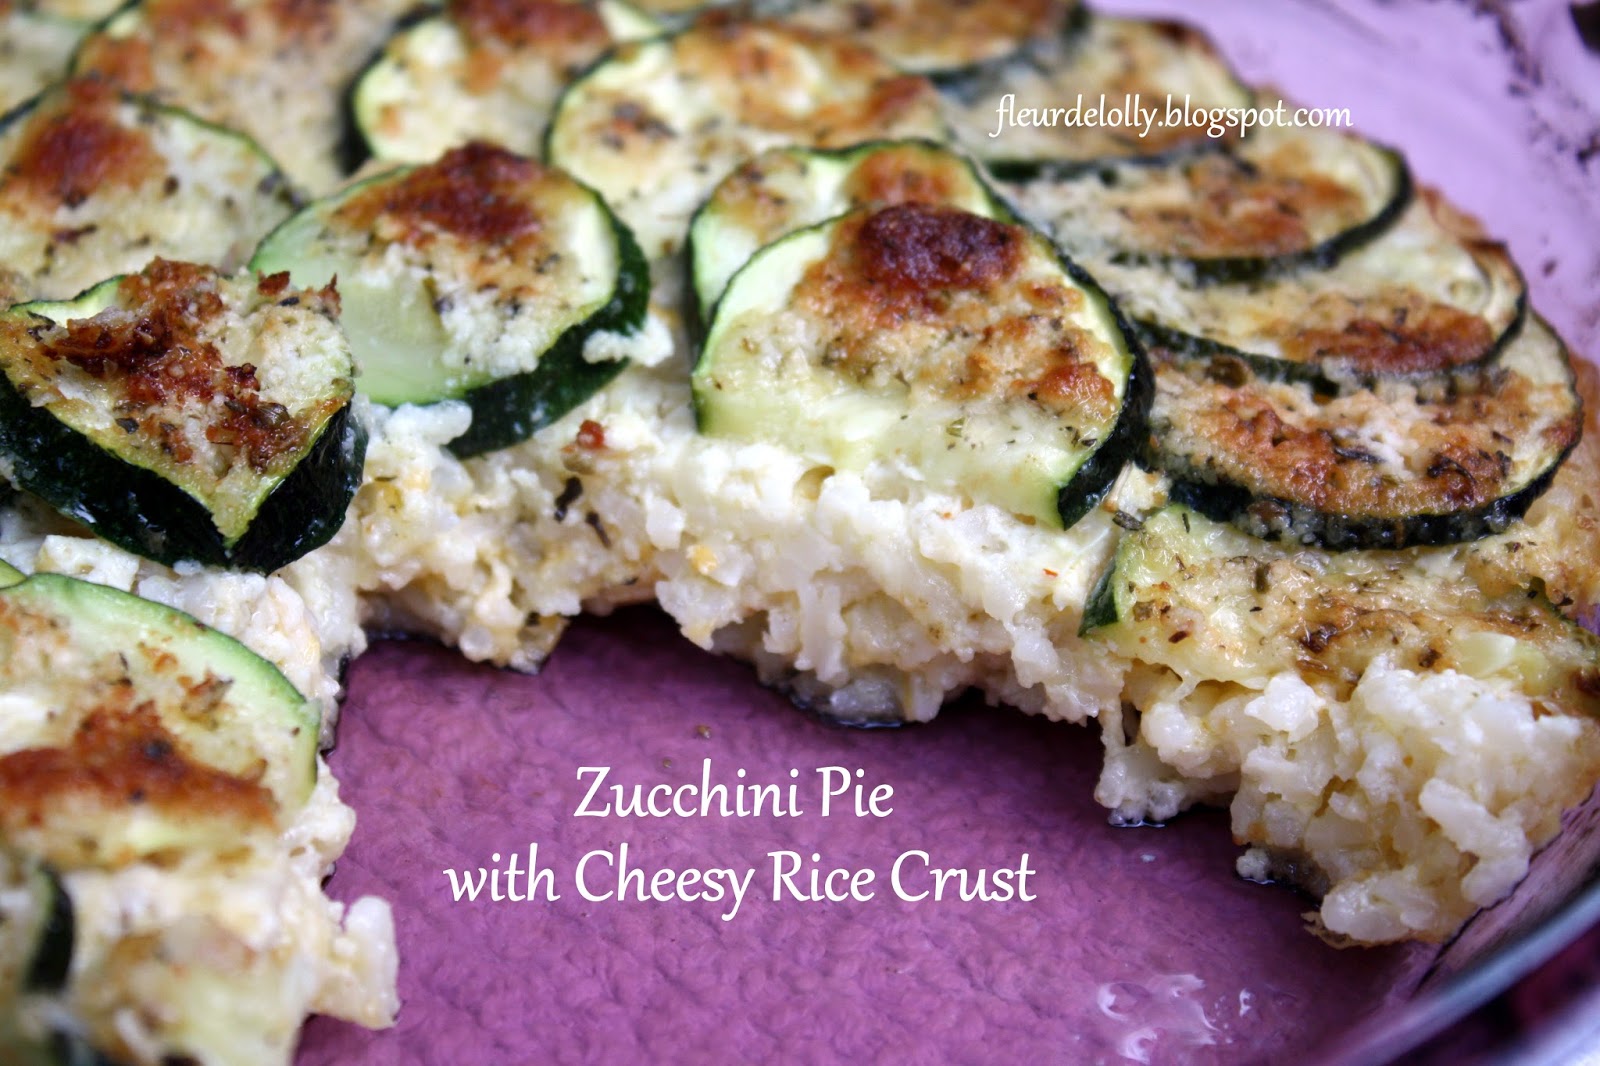
Zucchini Pie with Cheesy Rice Crust


'Tis the season for zucchini! Here's a great addition to your vegetarian options.

1 cup dry instant rice
1 cup low sodium chicken broth
1 cup shredded Cheddar cheese
1 egg, beaten
1/3 cup mayonnaise
1/2 t. red pepper flakes
2 zucchini, thinly sliced
4 T. unsalted butter, melted
1/4 cup grated Parmesan cheese
1 t. dried Italian seasoning
1/4 t. kosher salt

Preheat oven to 400 degrees.

Coat a 9 inch pie plate with nonstick spray.

Combine rice, broth, Cheddar, egg, mayonnaise, and pepper flakes; pour into prepared dish.

Arrange zucchini in an overlapping spiral on top of rice mixture.

Combine butter, Parmesan, Italian seasoning, and salt; pour over zucchini.

Bake pie until bubbly and top is golden, 30 - 35 minutes; let rest 10 minutes.


From Cuisine at Home Issue No. 117

Tuesday, August 2, 2016

Open Faced Spanish Pot Roast Sandwiches with Iberico Cheese


Remember the Spanish Pot Roast with Anchovies and Sherry we had last week? I froze the leftovers and tonight thawed out the roast to have opened faced sandwiches. I've included a recipe for a very easy brown gravy. Combine the leftover roast with the gravy and let the beef heat through.

I served on top of small, hard rolls which I sliced and spread lightly with butter and then placed under the broiler until toasted. The perfect cheese to top these lovely sandwiches? Iberico, which is a product of Spain and is that country's number one selling cheese. Iberico is a blend of cow, goat, and sheep's milk.


For the Gravy:

3 T. butter
3 T. all purpose flour
2 cups warm beef stock
salt and pepper to taste

Melt the butter in a small saucepan, over medium heat. Sprinkle in the flour, whisking constantly to break up all lumps. The longer the roux is cooked, the darker and richer it will get. I usually cook my gravy roux for 3 - 4 minutes.

Make sure your beef stock is warm before adding to the roux. Pour in about 1/4 cup at a time, whisking after each addition.

Add your 2 cups of warmed liquid slowly and bring to a boil. Warm the liquid up in a separate pot or in the microwave before adding it. Only pour in 1/4 cup at a time, whisking it in well before adding the next bit. You don't want to cause any rapid temperature changes in your gravy
Lower the heat and let the gravy simmer until desired thickness.  The gravy will thicken some as it cools, so take it off the heat 1 - 2 minutes before your desired consistency.  Salt and pepper to taste.

So toast those split rolls, ladle on the roast beef and gravy, and top with shaved Iberico. Sprinkle with parsley and serve.


Monday, August 1, 2016

Hoisin Chicken with Bok Choy Fried Rice


Asian inspired dishes are big on flavor and sometimes lots of heat. This dish has a gentle warmth, but I promise no searing spiciness. The glaze is spicy, sweet, and savory. I could see using this glaze on shrimp as well. The chicken is baked at a very high heat which sets the glaze and allows it to thicken and caramelize directly on the chicken. Served with Bok Choy Fried Rice, this is an easy weeknight meal.

Hoisin sauce is a thick, reddish-brown mixture of soybeans, garlic, chile peppers, and spices....sort of like a Chinese BBQ sauce! Don't use a glass baking dish for this one. The very high oven temperature could cause the glass to shatter. I used an enameled cast iron baking dish.

1 T. peanut oil
6 chicken thighs (about 1 1/2 - 2 lbs.) (I used boneless / skinless, but that's your call)
1/3 cup hoisin sauce
2 T. chopped scallions
1 T. EACH minced fresh ginger and garlic
2 t. EACH soy suace and rice vinegar
1 t. EACH garlic chili sauce and sesame oil

Preheat oven to 500 degrees. If using a metal pan, line with foil.

Whisk together hoisin, scallions, ginger, garlic, soy sauce, vinegar, garlic chile sauce, and sesame oil in a bowl. Set aside.

Heat oil in a large saute pan over high heat. Add thighs, skin-side down, and cook until brown and crispy , 5 minutes.


Remove thighs from saute pan and place into prepared baking dish, skin side up. Pour glaze mixture evenly over chicken. Roast thighs 10 minutes. 


Cover pan with foil and roast thighs for another 10 minutes or until an instant read thermometer inserted near, but not touching, the bones registers 175 degrees.

Spoon any glaze left in the pan over the chicken before serving.


From Cuisine at Home Issue No. 117.


Bok Choy Fried Rice


This was the side dish served alongside the Hoisin Chicken. Usually, when you make fried rice you need day old rice. For this dish, you can use your favorite brand/type of rice or to make it really simple for a weeknight meal, while you prep the bok choy, simply prepare a package of boil-in-bag rice. It will work perfectly.

Garlic and fresh ginger are quickly fried in oil before the bok choy goes in the skillet. This gives a great crunchy texture to the rice. This one is a winner.

1 cup dry jasmine rice 
2 cups water
3 T. peanut oil
2 T. EACH minced fresh ginger and garlic
salt to taste
1 1/2 cup chopped bok choy stems
3 cups chopped bok choy leaves
Black pepper to taste

Cook rice according to package direction. Set aside.

Heat oil in a skillet over high heat. Add ginger and garlic and stir-fry until golden brown and crispy, about 2 minutes; transfer to a paper-towel lined saucer and season with salt. The aroma while these two ingredients cook is amazing. Trust me.


Add bok choy stems to skillet and saute over medium high heat until softened, 5 minutes.


Add bok choy leaves and cook until softened, 2 minutes.


Increase heat to high; add rice and stir constantly until rice is crisp and slightly brown, 5 minutes.


Stir in garlic and ginger; season with salt and pepper.  Enjoy!


From Cuisine at Home Issue 117