Wednesday, July 29, 2015

It's Road Trip Time!

I wanted to give all of you a heads up!  Next week, Fleur de Lolly and Sweet Harold will be taking a road trip.  And what a road trip it will be!  We will be escaping the smothering heat and humidity of the South and going to the Great North.  As in Detroit, Ontario Canada, and, time permitting, all the way to Sault Ste. Marie!
 
There will be LOTS of pictures as we explore, what is to us, completely unknown territory.  I am so excited and will make sure to share notes and opinions on a variety of restaurants.  If you have any suggestions, please share!
 
Of course, I'll bore y'all with my version of "home movie" pictures of things that catch my eye.  
 
Prayers, good thoughts, and happy mojo requested for a safe and fun trip please!

Tuesday, July 28, 2015

Italian Sausage & Orzo Stuffed Peppers


The garden continues to give us beautiful multi-colored bell peppers.  Not only are they delicious in salads and to top pizzas, but how better to utilize their beauty than to stuff them with yummy goodness and bake until they are tender?

Let's make our filling and prepare the peppers for stuffing.

1 pound Italian sausage
32 oz. spaghetti sauce (I used a quart of my home canned sauce from last year)
1 cup uncooked orzo pasta
1 cup shredded mozzarella cheese

Brown the sausage over medium heat in a large skillet.  When sausage has browned, drain fat and add 1 cup of the sauce.


Now add 3/4 cup of the mozzarella and stir to combine.  Turn off heat.


In a medium saucepan, cook 1 cup of orzo in boiling water for about 6 minutes.  Drain well and add to the sausage and sauce mixture.


While sausage is browning and orzo is cooking, wash peppers and remove the tops of peppers and remove core and seeds.  Spray a 9 x 13 casserole dish with non-stick spray and place peppers inside.


Preheat oven to 350 degrees.

Gently fill each pepper with the sausage mixture.


Pour remaining sauce around peppers, cover the casserole dish with foil and bake for 45 minutes.


After 45 minutes, remove from oven, spoon some of the sauce over the peppers and top with remaining mozzarella.  Return to oven for 15 - 20 minutes.


And here we are, ready to serve!


Salad with Fresh Vegetables


The garden continues to provide lovely fresh vegetables for summer salads.  For this colorful salad, I chopped Romaine lettuce, added cubed cucumbers, diced red, yellow and green bell peppers and chopped tomatoes.

Remember to salt and pepper your salad greens!

This salad was delicious topped with Lemon Parmesan Salad Dressing.

Lemon Parmesan Salad Dressing


As you know, I love all things lemon.  Of course, my love of cheese is legendary.  So, if you combine the two into a great salad dressing, well, BRING ON THE SALAD GREENS!

This dressing is easily shaken to blend all the ingredients together in a jar with a snug fitting lid.  The amount of lemon juice will depend on the size of the lemons you use, but a good starting point is 3 - 4 T. of juice.  It's better to start with less and add more!

1 cup light olive oil
1 1/2 cups freshly grated Parmesan cheese (use the best you can afford!)
3 - 4 T. fresh lemon juice
1/2 t. lemon zest
1/4 t. salt
1/4 t. freshly ground black pepper
2 - 3 garlic cloves, grated
1/4 t. dried Italian seasoning
1/8 t. red pepper flakes

Add all ingredients to a jar, make sure the lid is on TIGHT and shake to mix.  If you're not using immediately, refrigerate.  When ready to serve, let dressing reach room temp and shake to blend.


Heirloom Tomato Pie


I've made many versions of tomato pie which resulted in an almost deep dish pizza variety. I decided to attempt a tomato pie with the filling underneath the tomatoes instead of burying these beautiful slices of heaven underneath a heavy layer of mayo/cheese. I loved this one!


I used a mixture of tomatoes including Cherokee Purple, Mr. Stripey, Manyel, and Mortgage Lifter. I LOVE the names of these tomatoes. You will need about 2 lbs. of tomatoes.


Slice the tomatoes about 1/4" thick and place in a colander. Place the colander over a bowl or in the sink. Sprinkle with kosher salt, toss to coat the slices and let the tomatoes drain while you prepare the crust and the filling.

You could certainly make your own piecrust or use a deep dish crust, but I used what I had in the freezer. I let the crust soften a little while the oven preheated to 350 degrees and then pricked the crust all over with a fork before putting it in the oven for about 8 minutes. Remove from oven and let cool while you make the filling.

In a medium skillet, I added 1 T. olive oil and one large, thinly sliced, yellow onion. Sprinkle with salt and let the onions soften. Remove from heat when they begin to brown. Let the onions cool slightly.

In a large bowl, combine 3/4 cup freshly shredded Parmesan cheese, 1/2 cup mayonnaise (I use Duke's), 3/4 cup shredded Mozzarella cheese and 3 T. Italian bread crumbs.I tend to add a LOT of freshly ground black pepper where tomatoes are concerned, but start with a 1/4 t. and go from there to satisfy your taste. Fold in onions and then spoon into pie crust.


Now it's time to layer on the tomato slices. Drizzle the tomatoes with 1 t. olive oil and sprinkle with salt. Place pie onto a baking sheet and place in a 350 degree oven.


Bake for 30 minutes or so, depending on whether you used a deep dish crust.


Add a little more shredded Parmesan cheese and you're ready to enjoy this delicious Heirloom Tomato Pie.


Friday, July 24, 2015

Jamaican Jerk Grilled Pork Chop with Yellow Rice & Black Beans


I'm going to post two links to Lolly recommended products tonight. Marinades and seasoning blends can add so much flavor and are readily available. I had three thick cut pork chops just waiting for the grill. I was in an island frame of mind so jerk seasoning was the ideal selection.

I took the pork chops, placed them in gallon size Ziploc bag and poured in about 1 cup of Jamaican Style Jerk Marinade

Then I placed them back into the refrigerator until time to grill which was about 6 hours. I turned the bag over several times during that time period to make sure the marinade was completely coating the pork chops.

While the chops were marinating, I took 2 cups of dried black beans, placed them in a bowl and covered with water. I let the beans soak for about 2 hours, drained off the water and placed them in a medium saucepan. Cover the beans with 3 - 4 cup of chicken broth, add 2 cloves of minced garlic and 1/2 t. of McCormick Perfect Pinch Caribbean Jerk Seasoning. Bring to a boil and then reduce the heat to allow the beans to simmer for a few hours until they are tender. Using a potato masher, gently mash the beans to thicken the batch a little.

For the yellow rice, purchase your favorite brand, cook according to the package directions, and add a little of the McCormick seasoning when the rice has cooked.

Now to grill the pork chops. Preheat the grill to 350 degrees. Place the chops on the grill and let cook for about 12-15 minutes before turning them over to cook about the same amount of time. Cook to an internal temp of 165-170 degrees. Let the pork chops rest for 5 minutes or so before serving.
 

Thursday, July 23, 2015

Pink Eye Purple Hull Field Peas


I love this type of pea. Typically referred to simply as "field peas" in the South, I can make a meal from a bowl of these and some hot cornbread. And maybe some sliced onion!

1 pound of frozen purple hull peas
water to cover by about 2 inches
4 slices bacon, diced OR 1/2 cup cubed ham or 1 ham hock
salt and pepper to taste

Bring peas and water to a boil over medium high heat in a large Dutch oven or cast iron pot. If you're using a ham hock, add it now.

Reduce heat to a simmer and cover.

Cook, stirring occasionally, for 1 1/2 - 2 hours. Add diced bacon or ham and let simmer for another 1/2 hour or so.

Add water as needed.

And you can't have peas without cornbread! Here's the recipe.

Southern Fried Okra


One of my absolute favorite dishes is fried okra.  No sliminess here!  Just lovely crunchy goodness.

3 - 4 cups sliced okra (about 1/4" thickness)
1 cup self-rising cornmeal
salt and pepper to taste
1/4 cup canola, vegetable, corn or coconut oil

Mix cornmeal with salt and pepper.  Lightly toss sliced okra in cornmeal.  Shake off the excess cornmeal and set aside. 

In a large cast iron skillet, heat oil over medium high heat.  When oil reaches the shimmering point, add okra to skillet and fry until lightly browned.  Drain on paper towels and add salt if needed.

Wednesday, July 22, 2015

Braised Roast with Carrots and Onions with Brown Gravy


The secret to an extremely tender roast is to braise the beef over low heat.  Purchase a roast with lots of marbling.  That will guarantee that your roast will be fork tender after braising.

2 - 2 1/2 lb. boneless chuck roast
Salt and freshly ground black pepper
2 T. olive oil
6 cups beef stock
1 large yellow onion, halved lengthwise and then cut into quarters
3 cloves of garlic
1 bay leaf
4 - 5 carrots, ends trimmed, halved and cut into 3 - 4" long pieces

Rinse roast and pat dry with paper towels.  Liberally salt and pepper roast.
In a large Dutch oven, heat olive oil over high heat.  When oil shimmers, place roast into the Dutch oven and sear the roast on all sides.


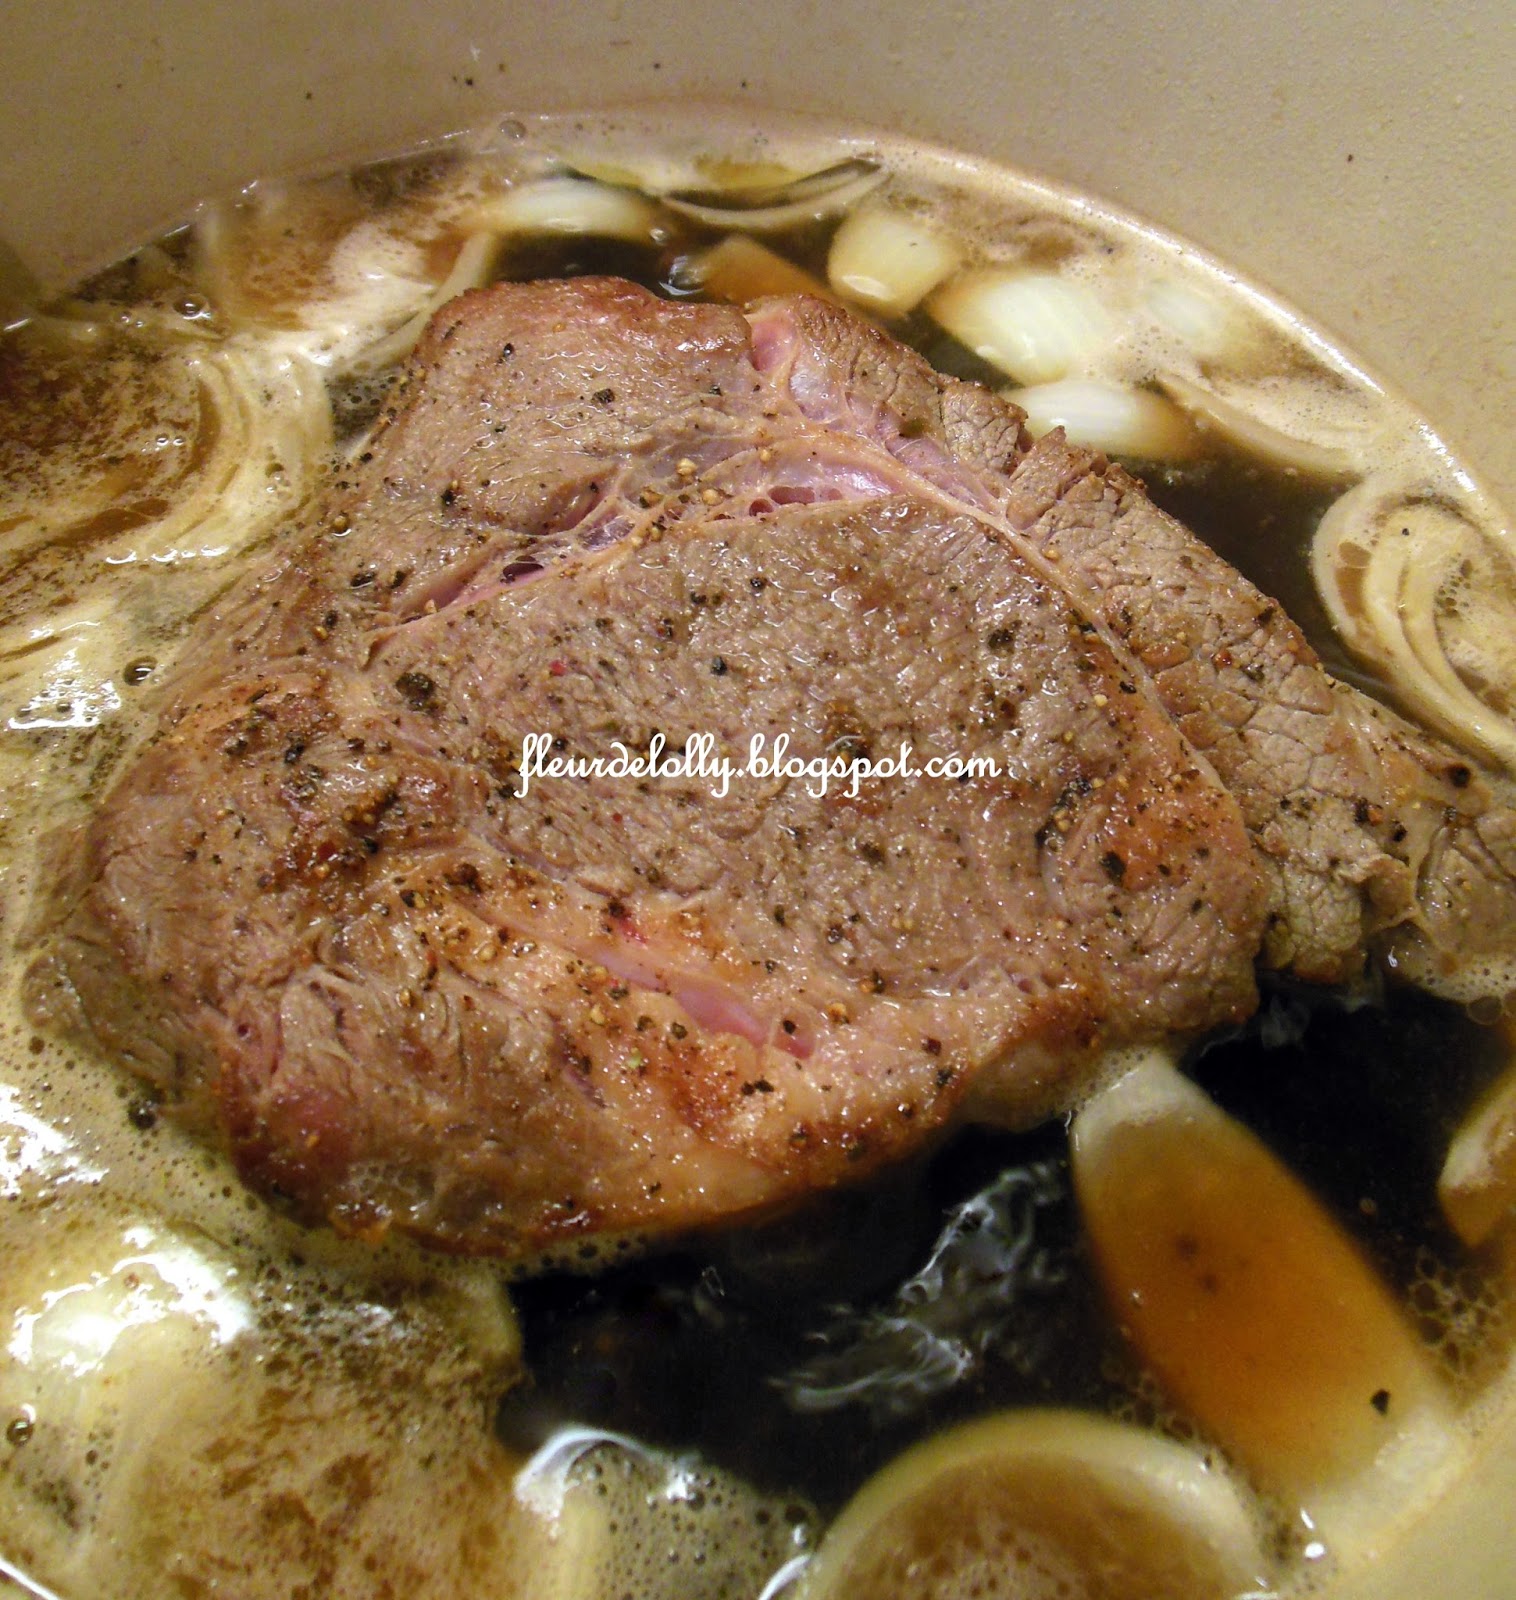
Add beef stock, onions, garlic and bay leaf.  When stock comes to a boil, reduce heat to a simmer.  Partially cover the roast and let it simmer for several hours, turning the roast over every 30- 45 minutes or so.


I usually let my roast simmer for 3 - 4 hours.  Larger roasts will need to cook longer, of course.  Add the carrots about 30 minutes before serving.  You will want these to cook just until they are fork tender.

I like to be able to pull the roast into pieces to place on a serving platter instead of slicing the roast.  If you prefer slices, remove from stock when you reach your desired level of doneness.

Place on a serving platter and arrange the carrots and onions with the roast.  Discard bay leaf.

Now to make the gravy:

In a medium saucepan, add 4 T. of the fat from the top of the liquid in which the roast cooked.  Add 4 T. self-rising flour.  Place over medium heat and, stirring constantly, cook for 2 - 3 minutes until flour begins to brown.  Slowly add 4 cups of the broth to the roux, stirring constantly while the gravy thickens. 

Reduce heat to low and continue stirring to remove any lumps.  Taste and season with salt and pepper if needed.


Green Beans with New Potatoes


Delicious green beans straight from the garden with, what else?, new potatoes from the garden! Yes, green beans are delicious steamed or cooked crisp/tender, but sometimes I just need those green beans to be cooked for hours with a little bacon grease added. The addition of freshly dug new potatoes from the garden takes them to a whole different level.

2 pounds green beans, ends trimmed, strings removed and broken into 1 - 1 1/2 inch pieces
water to cover
1 chicken bouillon cube
freshly ground black pepper
1 - 2 T. bacon grease
1/2 pound or so of small potatoes

In a large Dutch oven, place the green beans and water to cover. Bring to a boil over high heat and then lower heat to keep the liquid at a simmer. Partially cover and let cook for 30 - 45 minutes. Add the bouillon cube and black pepper. Continue to simmer for another 30 minutes or so and add bacon grease. Of course, you can omit this or add a little more if you'd like.

When green beans have "cooked down" which means that the liquid has reduced by at least half, add the potatoes and make sure they are immersed in the remaining liquid. Cook for 15 - 20 minutes until potatoes are soft.

Taste and check seasoning. Depending on how much bacon grease is used (if any), you may need to add additional salt.


The Most Important Hot Dog Quiz You'll Ever Take!

First of all, I LOVE Hebrew National Hot Dogs...secondly, who couldn't use a $200 Kroger Gift Card?

Take some trivia and build your own hot dog for a chance to win a Kroger Gift Card!

Tuesday, July 21, 2015

Silver Queen Corn


My favorite type of corn, cooked my favorite way, eaten with my favorite people. You can't beat that, I don't care who you are.

Silver Queen corn gives big ears of crisp, tender white kernels that provide sweet, rich, old-fashioned flavor and texture. Silver Queen is THE the standard for white sweet corn flavor.

12 ears corn, shucked, silks removed and rinsed with cool water
2 cups water
1/2 stick butter
salt
pepper
1/4 - 1/3 cup heavy cream

Remove kernels from corn cob by slicing with a very sharp knife. If possible, slice the kernels about halfway through and then make a SECOND cut up (or down) the cob. This will help release the milky goodness that Silver Queen corn is known for.

Place corn in a medium Dutch oven and add water. Over very low heat (you don't want the corn to stick!), let the corn come to a gentle simmer.

Stir the corn frequently and cook for an hour or so until the corn is tender to the taste. Add the butter, salt, pepper, and heavy cream. Stir to combine and let cook for another 20 - 30 minutes or so.

If you want the corn to be thicker, make a slurry by combining in a small bowl, a few tablespoons of self-rising flour and water. Add to the corn and let come to a boil to thicken the corn.


Buttermilk Cornbread


My signature cornbread recipe never changes.  So, therefore, I will repeat word for word my previous cornbread post.  Please give it a try and let me know what you think. 

There are hundreds of recipes for cornbread.  Some contain flour, some have sugar, some add eggs or oil.

Take a deep breath before you read any further.  Here is Lolly's Secret Recipe for cornbread.  Are you ready?

2 cups of self-rising white cornmeal
2 cups buttermilk
2 T. bacon grease

Yes, that's it.  That's the entire recipe.  

I won 1st Place in every 4-H Bread Competition I entered in elementary and junior high school.  I bet you didn't know that, did you?  I decided if the recipe wasn't broken, I wouldn't try to fix it.  

Preheat oven to 375 degrees.  

In a medium mixing bowl, add cornmeal and then slowly stir in buttermilk until it's well blended.  

Put the bacon grease in a cast iron skillet and heat it over medium heat until a drop of the batter sizzles.


Pour the batter into the skillet and bake until golden brown about 20 - 25 minutes. Remove from oven and let rest in skillet for a few minutes before turning out onto a serving plate.

Monday, July 20, 2015

Stewed Tomatoes and Okra


Another family favorite that really doesn't have a recipe because you can add more or less of any of the ingredients.  It's perfect for when the tomatoes are hanging ripe on the vine and the okra pods are young and tender.  Enjoy!

3 cups of chopped ripe tomatoes
1/2 red onion chopped
1 small jalapeno, diced OR 1 small green bell pepper, diced
1 clove garlic minced
10 - 12 okra pods, ends trimmed and sliced 1/4" thick
salt and pepper to taste
1/2 t. sugar

In a small saucepan, add all ingredients and heat to a gentle simmer over medium low heat.  Let simmer for an hour or so until okra is very tender.  Taste and adjust seasonings, if needed.


The "Boarding House Sunday Dinner" Table!

Yes, here it is....


From middle top and clockwise:

Fried okra, field peas, cantaloupe, creamed corn, deviled eggs, cornbread, sliced tomatoes, tomatoes and okra, roast beef and carrots, brown gravy, green beans with new potatoes and, last but not least, squash casserole!


Recipes coming up!

Squash Casserole


There are so many different ways to prepare a squash casserole. I made this one up as I went along yesterday. I think it was the best one I've made in a long while!

6 medium squash, ends trimmed
1 T. olive oil
1/2 medium yellow onion, chopped
salt and pepper to taste
1 egg, lightly beaten
1/2 - 3/4 cup sour cream
1 cup sharp cheddar cheese, divided

Preheat oven to 350 degrees and lightly grease a small to medium casserole dish.

Grate squash on a box grater using the large hole side.  

Add olive oil to medium skillet and heat over medium high heat. Add squash, onions and salt and pepper and let cook, stirring frequently until moisture evaporates from squash, 3 - 5 minutes. Remove from heat and allow to cool for about 5 minutes.

Place squash and onions into a medium bowl and add the egg and sour cream. Fold in 1/2 cup of the shredded cheese.

Spoon into casserole dish and top with remaining 1/2 cup of cheese. Bake for 20 - 25 minutes until golden brown.


Sunday, July 19, 2015

Boarding House Sunday Afternoon Dinner Table Setting


The best food time for me is right now!  The middle of the summer when garden vegetables are at their peak.  

I was thinking about all those women who ran boarding houses long ago and how much work (and hopefully a little fun) it was to have dinner on the table every night for all their boarders.  So here's the result of my daydreaming.  

Nothing too fancy for the table, but a little nicer than every day, because it IS Sunday Dinner.

The place settings were my mother in law's: Martha Stewart Every Day made in France.  They are EXACTLY what I had in mind.


The cobalt Fiestaware butter dish matches up nicely, don't you think?


I love these cobalt blue glass candlesticks.  And the S and P shakers were purchased in an antique store in Nitro, West Virginia!


Friday, July 17, 2015

It's tomato canning time!


This week was tomato canning week!  Made a short drive to pick up two boxes of Chandler Mountain tomatoes and then home to begin the canning process.


These tomatoes were very large and it took 5 of them quartered to fill a quart jar.  So to begin you need to wash and sterile your quart canning jars.  A nice cycle through the dishwasher is the perfect thing.  You will also need to wash and sterilize the rings and lids.

Bring a large pot of water to a gentle boil. Wash the tomatoes a few at a time and light score the bottom with an "X".  Drop the tomatoes a few at a time into the boiling water until the peeling begins to loosen.  Have a large bowl (or your kitchen sink) full of ice water ready.  As the tomatoes come out of the blanching water, place them in the ice water.  Core the tomatoes and, depending on the size of them, halve or quarter the tomatoes and begin to pack the jars.  Core the tomatoes over a bowl to catch the juices.

Pack the jars and add the reserved juice to the jars.  Wipe the rims and add 1 t. salt to each quart of tomatoes.  Place the lids and rings on the jars and either place in a pressure cooker or to a deep pot filled with boiling water. The water needs to cover the tops of the jars by at least 2 inches.  Process the tomatoes for 45 minutes.

Carefully remove the jars from the water bath and place in a draft free area to cool.  Listen for the "ping" as the jars seal.  Refrigerate any jars that don't seal and use with a day or two.  

Tighten the rings and store in a cool, dark place until ready to use. 

Thursday, July 16, 2015

Chandler Mountain Tomato Fields


There is a mountain in St. Clair County in North Alabama, known locally simply as Chandler Mountain. This mountain looks similar to any mountain in the Southern Appalachians, but one thing sets it apart. The top of Chandler Mountain was discovered to be an ideal location for growing tomatoes. In fact, it is possible to grow two, and sometimes three, crops a year.  


This week I took a day off from work, traveled the 20 miles or so to Chandler Mountain, and purchased tomatoes to can.  I thought you might enjoy seeing the mountain from the valley below and then some of the fields upon fields of tomatoes in all stages of growth from tiny tomato plants to those which were being picked even as I stopped to take a few pictures.  

Yes, way up there on the top of that mountain is where those delicious tomatoes grow!


Now we'll look down into the valley!


Now on to the tomato fields.  Look closely and you'll see the tiny little plants.


And as you drive around the top of this gorgeous mountain, there are fields everywhere!


And now the picture of the beautiful tomatoes that came home with me!